Scanners are crucial today because they make it possible to quickly and easily digitise paper documents. Scanners are indispensable for capturing and archiving data, from the workplace to the home to the field. However, scanners, like all electrical equipment, require routine cleaning and maintenance for optimal performance and extended life. Maintaining your scanner will ensure its continued peak performance and the integrity of your scanned documents.
Image distortion, paper clogs, and a decline in scanning quality are all avoidable with regular maintenance. Dust, debris, & ink residue would accumulate over time, diminishing scan quality.
For this reason, maintenance on a regular basis is essential. You can keep your scanner in top shape and ensure it continues to reliably meet your document digitisation needs by cleaning and maintaining it as directed.
The Importance Of Regular Maintenance
Preserving your scanner in pristine functioning condition requires regular upkeep. Maintaining your scanner regularly will head off a wide range of potential problems. In addition to extending the life of your device, preventative upkeep is crucial for minimising disruptions to your scanning workflow and preserving the integrity of your data.
Scanners are prone to issues, including paper jams, blurred images, and mechanical breakdowns, if they are not regularly serviced. These problems can have a major effect on how well the scanner functions, which is inconvenient and frustrating for the user. You can reduce the likelihood of these issues and guarantee that your scanner always produces precise and high-quality scans by performing routine maintenance.
In addition, preventative maintenance helps your scanning processes run more smoothly and effectively. Once your scanner is in good working order, you can count on it to perform each scanning job with minimal interruption. This is paramount for individuals and organisations who rely significantly on scanners for digital archiving and document management.
In addition, the scanner’s general performance and usefulness may suffer without regular maintenance. The scanner’s efficiency can be diminished if dust, debris, and other impurities build up on its outside shell and inner workings. These problems can be mitigated with regular servicing, which also keeps the scanner in perfect shape.
You can avoid spending money on repairs or replacements by building routine maintenance into your routine for caring for your scanner. If you don’t keep up with routine maintenance, you could end up having to hire a repairer or possibly have to buy a new scanner. Yet, if regular maintenance is performed, any minor problems can be addressed before they develop into expensive catastrophes.
Your scanner will serve you well and last much longer if you keep up with routine maintenance. A scanner can provide dependable and high-quality scans for a longer period if you establish a practice of cleaning and servicing. Putting in a little effort regularly to maintain your vehicle will return dividends in increased performance, productivity, and reduced operating costs.
Scanner Maintenance Tips
It’s essential to maintain routine maintenance if you want your scanner to last as long as possible. Paper jams, poor prints, and broken mechanisms are all avoided. Regular maintenance reduces the need for repairs and increases the reliability of your scans.
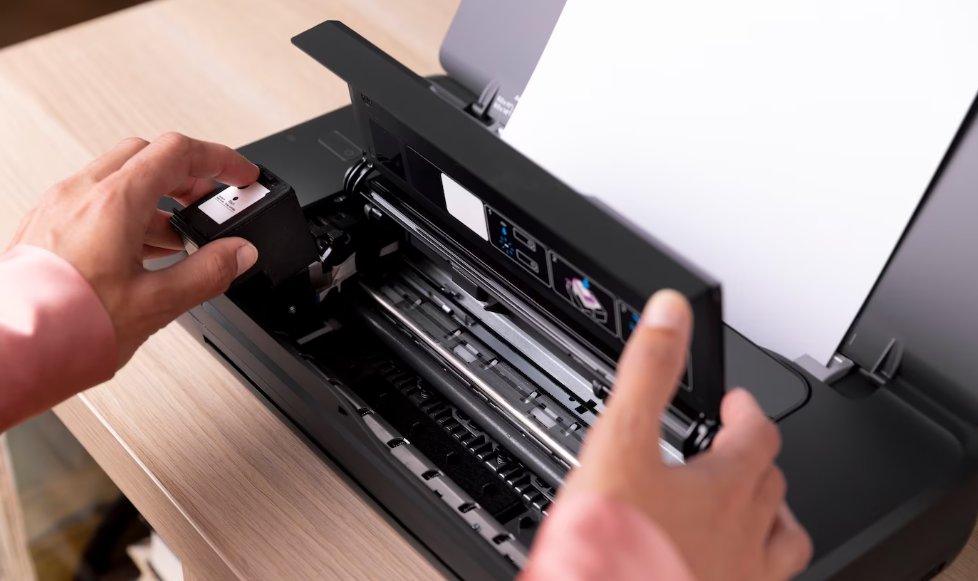
Scanner Glass Cleaning
Maintaining your scanner’s performance & scan quality requires regular cleaning of the scanner glass. Its scanner glass is where the originals and scans will meet. Dust, fingerprints, smudges, and other debris, can accumulate over time, diminishing the quality of your scans. The scanner glass can be cleaned as follows:
- Prepare the Cleaning Solution: Make a cleaning solution as a first step. A commercial glass cleaner meant for devices or a mixture of water & mild dish soap will do the trick. Scanning glass can easily be broken by applying abrasive cleaning or caustic chemicals.
- Power Off the Scanner: Power down the scanner and remove the power cord before cleaning its scanner glass. This will keep you safe as you clean.
- Dampen a Lint-free Cloth: Use the cleaning solution to dampen a lint-free cloth. It’s important to have a damp cloth, not a drenched one. Scanners are vulnerable to the intrusion of moisture.
- Gently Wipe the Scanner Glass: Use a moist cloth to wipe the scanner glass carefully. Make sure to get every inch of the glass using straight, even strokes. Focus on the spots that are stained or smudged.
- Remove Residue: A clean, lint-free cloth or a clean microfibre cloth can remove residue and smears from the scanner glass. Use soft circular motions to buff the glass until all residue is gone.
- Allow the Glass to Dry: The scanner glass must dry thoroughly after cleaning. Before starting the scanner again, make sure the glass is completely dry.
- Repeat if Necessary: Repeat the process with a new moist towel and cleaning solution if necessary to get the scanner glass spotless. To get what you want, you need to be patient and thorough.
Always refer to your scanner’s user guide for the manufacturer’s recommended method(s) for cleaning your scanner glass. You can keep your scanner running smoothly and reliably by cleaning the scanner glass.
Keeping The Feed Rollers Clean

Paper feeding problems can be avoided, and scanning reliability is maintained by regularly cleaning the fed rollers of your scanner. Misfeeds, paper blockages, and inefficient scanning can result from dust, dirt, and paper residue building up on the feed rollers over time. Follow these steps to clean the feed rollers properly:
- Please consult the User Manual: To clean the scanner’s feed rollers, it is recommended first to consult the scanner’s user handbook. You can find all the instructions and safety measures in the manual.
- Prepare a Cleaning Solution: Mix a little amount of mild dish soap into the water, or use the cleaning solution suggested by the scanner’s manufacturer. To keep the rollers in good condition, avoid using harsh chemicals or abrasive cleansers.
- Power Off the Scanner: Always remove the scanner from its power source and switch it off before cleaning any feed rollers. This safety practice is essential to ensuring your well-being when cleaning.
- Access the Feed Rollers: Accessing the feed rollers correctly requires following the directions in the user handbook. Rollers on certain scanners are located in obvious places, but on others, you may need to remove panels or other components to gain access. To prevent injury or harm, take your moment and proceed carefully.
- Dampen a Lint-free Cloth: Prepare a cleaning solution and dampen a sticky gunk cloth. It’s important to have a damp cloth rather than a dripping one. If the scanner gets wet, it can malfunction.
- Clean the Rollers: Use very light pressure to rub the wet cloth along the feed rollers. To clean the full roller’s diameter, you’ll need to rotate it physically. Cleaning this way helps eliminate dirt, grime, and residues that may have built up over time. Take care not to overdo it, or you can break the rollers.
- Dry the Rollers: To dry them after cleaning, use a dry, lint-free cloth or let them air dry. Before starting the scanner again, make sure the rollers are completely dry.
- Perform a Test Scan: Reconnect your scanner to its power supply and do a test scan to make sure everything is working as it should as once the feed rollers have dried. If you’re having problems, see the scanner’s manual or contact support.
Maintaining your scanner’s functionality, avoiding paper feeding issues, and extending its life can all be achieved through routine cleaning of the device’s feed rollers. If you want your scans to come out as well as possible, you should make this part of your normal scanner maintenance regimen.
Dust And Debris Removal
Cleaning your scanner regularly to eliminate dust and other debris is crucial for running it well. The outside surfaces, scanning glass, and paper tray mechanisms of a scanner are all potential accumulation points for dust and debris. The following are some efficient means of cleaning up dust and dirt:
- Compressed Air: To clean the scanner’s more inaccessible crevices, a can of compressed air comes in helpful. Blow air into cracks, crevices, and gaps using a can of pressurised air fitted with a small nozzle attachment. This aids in loosening and removing dust particles. If you want to prevent creating additional force or moisture, you should use short periods of air while holding the can upright.
- Soft Brush or Microfiber Cloth: Dust can accumulate on the scanner’s exterior, so using a soft brush and microfiber cloth to wipe it off is a good idea. Dust may be easily removed from the scanner’s housing, control panel, & buttons by giving them a light brushing or wiping. Be cautious of scratching the surface by using a dirty brush or cloth.
- Lint Roller or Adhesive Tape: A lint brush or adhesive tape can remove dust and other particles from the scanner’s surfaces. Dust and tiny particles can be collected by rolling a lint roller over the affected regions or by pressing the sticky side of the tape against them. This technique is ideal for removing lint, hair, or other microscopic fibres stuck on the scanner.
- Cleaning Solution for Scanner Glass: The scanner glass cleaning instructions were previously discussed in the “Cleaning the Scanner Glass” section. Smudges, fingerprints, and another residue can be removed from the scanner glass by wiping it with a lint-free cloth that has been wet with such a light cleaning solution and glass cleaner.
- Cleaning Swabs or Cotton Swabs: Smaller scanner parts or sections may occasionally require cleaning. Use cotton or cleaning swabs wetted in a cleaning solution to scrub hard-to-reach crevices. Caution is advised since too much moisture could cause the scanner’s delicate parts to break.
If you want to know how to clean your scanner, the best place to look is the manufacturer’s manual. Cleaning your scanner on a regular basis will prolong its life, reduce the likelihood of mechanical failure, and guarantee scans of the highest possible quality. Scanning for longer periods will be possible if you incorporate these cleaning techniques into your regular maintenance practice.
Scanner Calibration
If you want reliable scans, calibration of your scanner is a necessity. The scanner’s image sensor & optics, among other internal components, can be better aligned through calibration. A general overview of scanner calibration is provided here.
- Check the User Manual: Before beginning the calibration process, it is recommended that you first study the scanner’s user handbook. Calibration procedures may vary slightly between scanner models, and it’s important to check the manual.
- Clean the Scanner: Make sure the scanner is free of dust and debris before beginning the calibration process. For specific instructions about how to clean your scanner, including how to clean the scanner glass and how to remove dust and debris, please refer to the previous sections.
- Prepare a Calibration Sheet: Most scanners have a dedicated calibration sheet in the box. Find the scanner’s calibration sheet and ensure it’s in good shape if one was included. If one calibration sheet is missing, look in the user manual or contact manufacturer assistance for alternatives.
- Enable Calibration Mode: Before beginning the calibration procedure, some scanners need a special calibration mode to be activated. If you’re unsure if your scanner needs this, consult the handbook. To enter calibration mode, you may need to use the scanner’s settings or the software’s user interface.
- Initiate the Calibration Process: To begin the calibration procedure, please refer to the user handbook. The calibration sheet can either be placed in the document feeder or directly on the scanner glass for this purpose.
- Scan the Calibration Sheet: Scan using the scanner’s software and control panel after placing the calibration sheet. The scanner will move across the calibration sheet, picking up individual calibration targets.
- Follow Software Prompts: You may need to flip the calibration sheet or fiddle with the settings during the scanning process. To calibrate the scanner properly, just follow the on-screen prompts and instructions.
- Complete the Calibration: The scanner’s calibration is complete after it has scanned the calibration document. To complete the calibration, run the software or use the control panel as directed.
Calibration procedures may change from scanner model to scanner model & software to software. If you want precise calibration results from your scanner, you should always follow the manufacturer’s guidelines. Maintaining your scanner’s accuracy and ensuring consistently high-quality scans requires performing regular calibrations as advised by the manufacturer.
Storage And Handling Procedures
Maintaining the life and efficiency of your scanner requires careful handling and storage. If you keep to these rules, your scanner will always function at its best:
- Keep in a Clean and Dust-Free Environment: Keep your scanner out of dusty environments to prolong its life and ensure proper operation. A scanner’s performance and scan quality are susceptible to dust accumulation. When the scanner is not in use, a dust cover can act as an extra line of defence.
- Avoid Extreme Temperatures and Humidity: Don’t expose your scanner to direct sunlight or high humidity. Scanner components like the image sensor & circuitry are susceptible to damage from environmental factors like heat and humidity. Most scanners will include a recommended humidity and temperature range in their user handbook.
- Handle with Care: Be cautious when carrying or repositioning the scanner. Try not to accidentally drop the scanner and subject it to disproportionate impact or pressure. Scanner casing & internal components are delicate; please handle them carefully and avoid setting big things on top of it.
- Use Proper Power Supply: Always use the scanner’s official power adapter or power supply. Scanning hardware may be damaged if an unsuitable power supply is used. Reach out to the manufacturer or an authorised service centre if you need a replacement power supply.
- Follow Manufacturer’s Maintenance Recommendations: For manufacturer-recommended servicing procedures, please consult the scanner’s user manual. This may involve upgrading hardware or updating software at regular intervals. If you follow these rules, you can extend the life of your scanner.
- Transportation: We are using the original box or even a similar protective case to transport the scanner safely. Be sure the scanner isn’t damaged by bumps and vibrations on the road by securing any dangling wires or screws.
- Regular Use: Scanners are intended for frequent use. When a scanner is not in use for just an extended period, it is recommended that it be turned on at regular intervals and put through a test scan to prevent the internal components from becoming dormant and causing problems.
Keeping your scanner in pristine condition for as long as possible by following these handling and storage recommendations. Always refer to your scanner’s user manual for the most up-to-date information and suggestions from the company that made your kind of scanner.

Troubleshooting Typical Problems
Knowing how to troubleshoot your scanner might help you fix common errors and get it working again. Common scanner problems and advice for fixing them are detailed below.
The scanner Isn’t Turning On.
If your scanner doesn’t power on, ensure the power cord is plugged in and not loose. Plug another appliance into the outlet to ensure it is working properly. If a different power cord doesn’t get the scanner going, then you should contact the manufacturer.
Paper Jams
If a piece of paper becomes caught in the scanner’s rollers, a paper jam will result. Here’s what you should do to fix the problem:
- Turn the scanner off and remove it from its power source.
- Any paper that has become jammed must be carefully removed by being pulled toward such a paper path. Avoid ripping the paper, as the resulting shreds could cause a jam in the future.
- Remove any torn paper or other debris that may have been found inside the scanner.
- Ensure the tray is properly loaded with paper, and don’t fill it any more than necessary.
- Turn on the scanner & check the paper feed by scanning a small piece of paper.
Scan Quality Issues
The following troubleshooting measures can be taken if scans are unclear, distorted, or blurry:
- Remove fingerprints, smudges, or other contaminants from the scanner glass to ensure a clear scan. Instructions on how to clean the scanner glass can be found in the next section.
- Make sure the scanner’s resolution is adjusted properly. Adjust the resolution so that it is suitable for the scanned document. In most cases, increasing the scan resolution will improve the scan quality.
- Ensure the paper is centred on the left side of the window or in the feeder. Check for straightness to make sure it looks good.
- You can get better scans by examining the scanner software’s picture correction and enhancement options.
- If that doesn’t work, try some of the more sophisticated troubleshooting steps outlined in the scanner’s user guide or contact the manufacturer.
Problems With Scanning Software
Here are some things to try if you’re having difficulties with the scanner’s software or getting it to work with your computer:
- Ensure you’re using the most recent drivers and software for your scanner. If an update is available, you can get it from their website or support page.
- If your computer or scanner is acting up, try restarting it to give the machine a new lease on life.
- Verify that your operating system is suitable for the scanner’s software. Verify that your PC satisfies the manufacturer’s minimal system requirements.
- Turn off any antivirus or other programmes that can cause problems for the scanner.
- If the issue remains after that, try erasing the scanner software and reinstalling it according to the manufacturer’s guidelines.
If you have any additional problems with your scanner, check the user manual or contact the company that made it. Different models of scanners and types of scanning software may require different troubleshooting procedures. If you follow these guidelines, you should be able to fix frequent scanner problems and enhance the device’s functionality.
Frequently Asked Questions About Scanners
How often should I clean my scanner?
The frequency of cleaning your scanner depends on how frequently you use it and the environment in which it is stored. As a general guideline, it is recommended to clean the scanner at least once every few months or whenever you notice a decline in scan quality. However, if you regularly handle large volumes of documents or operate the scanner in a dusty environment, more frequent cleaning may be necessary.
Can I use a regular glass cleaner to clean the scanner glass?
It is not recommended to use regular glass cleaner on the scanner glass. Instead, opt for a mild cleaning solution specifically designed for electronic devices or a glass cleaner recommended by the scanner manufacturer. Regular glass cleaners may contain chemicals that can damage the scanner glass or leave residues that affect scan quality.
What should I do if my scanner is not feeding the paper properly?
If your scanner is experiencing paper feeding issues, first ensure that the paper is loaded correctly in the tray and not exceeding the recommended capacity. Check for any obstructions or debris that may be blocking the paper path and remove them carefully. If the problem persists, consult the scanner’s user manual for specific troubleshooting steps or contact the manufacturer’s support for assistance.
How do I calibrate my scanner without a calibration sheet?
If your scanner does not come with a calibration sheet, refer to the user manual or contact the manufacturer’s support for alternative calibration methods. Some scanners may have built-in calibration routines or software options that can be utilised without needing a physical calibration sheet.
Can I use compressed air to clean the interior parts of the scanner?
It is generally not recommended to use compressed air directly on the interior parts of the scanner. While compressed air can be useful for blowing away loose dust from external surfaces, using it inside the scanner may push dust and debris further into sensitive components, potentially causing damage. If you need to clean the interior parts, consult the user manual for appropriate instructions or seek professional assistance.
Conclusion
Scanners are essential for capturing and archiving data, and regular maintenance is crucial for optimal performance and extended life. Regular cleaning and maintenance ensure the scanner’s peak performance and the integrity of scanned documents. Issues such as image distortion, paper clogs, and a decline in scanning quality can be avoided with regular maintenance. Dust, debris, and ink residue accumulate over time, diminishing scan quality. Regular servicing helps maintain the scanner’s efficiency and prevents issues like paper jams, blurred images, and mechanical breakdowns.
Maintaining routine maintenance helps prevent paper jams, poor prints, and broken mechanisms, reducing the need for repairs and increasing the reliability of scans. To clean the scanner glass, prepare a cleaning solution, power off the scanner, dampen a lint-free cloth, wipe the glass gently, remove residue, allow the glass to dry, and repeat if necessary. Always refer to the scanner’s user guide for the manufacturer’s recommended methods.
Keeping the feed rollers clean is crucial for maintaining scanning reliability. Misfeeds, paper blockages, and inefficient scanning can result from dust, dirt, and paper residue building up on the rollers. Follow the directions in the user handbook to access the rollers, dampen a lint-free cloth, clean the rollers, dry them, and perform a test scan. If you encounter problems, consult the scanner’s manual or contact support. Regular maintenance will ensure your scanner’s continued performance, productivity, and reduced operating costs.
Maintaining your scanner’s functionality, avoiding paper feeding issues, and extending its life is crucial for its performance and scan quality. Regular cleaning of the device’s feed rollers is essential for ensuring optimal performance. To remove dust and debris, use compressed air, soft brush or microfiber cloth, lint roller or adhesive tape, and cleaning swabs or cotton swabs. These cleaning techniques can prolong the scanner’s life, reduce the likelihood of mechanical failure, and guarantee high-quality scans.
Calibration is essential for reliable scans, as it helps align the scanner’s image sensor and optics. Before starting the calibration process, check the user manual and ensure the scanner is free of dust and debris. Prepare a calibration sheet, enable calibration mode, initiate the calibration process, scan the calibration sheet, follow software prompts, and complete the calibration. Calibration procedures may change between scanner models and software, so it is essential to follow the manufacturer’s guidelines for precise calibration results.
To maintain the scanner’s life and efficiency, follow these guidelines: keep it in a clean and dust-free environment, avoid extreme temperatures and humidity, handle it with care, use the correct power supply, follow manufacturer’s maintenance recommendations, and transport the scanner safely. Regular use of the scanner is recommended for frequent use, with regular tests to prevent internal components from becoming dormant and causing problems. Regular use of the scanner ensures its pristine condition for as long as possible. Troubleshooting common scanner problems can help fix errors and improve device functionality. Common issues include powering the scanner on, removing paper jams, adjusting the scanner’s resolution, ensuring the paper is centered on the left side of the window or in the feeder, and examining the scanner software’s picture correction and enhancement options.
If the issue persists, try restarting the machine, verifying the operating system is suitable for the scanner’s software, turning off antivirus programs, erasing the scanner software, and reinstalling it according to the manufacturer’s guidelines. If additional problems persist, consult the user manual or contact the manufacturer. By following these guidelines, you can fix common scanner problems and enhance the device’s functionality.
Content Summary:
- However, scanners, like all electrical equipment, require routine cleaning and maintenance for optimal performance and extended life.
- Maintaining your scanner will ensure its continued peak performance and the integrity of your scanned documents.
- For this reason, maintenance on a regular basis is essential.
- Preserving your scanner in pristine functioning condition requires regular upkeep.
- In addition, preventative maintenance helps your scanning processes run more smoothly and effectively.
- In addition, the scanner’s general performance and usefulness may suffer without regular maintenance.
- These problems can be mitigated with regular servicing, which also keeps the scanner in perfect shape.
- You can avoid spending money on repairs or replacements by building routine maintenance into your routine for caring for your scanner.
- Your scanner will serve you well and last much longer if you keep up with routine maintenance.
- It’s essential to maintain routine maintenance if you want your scanner to last as long as possible.
- Maintaining your scanner’s performance & scan quality requires regular cleaning of the scanner glass.
- The scanner glass can be cleaned as follows:
- Make a cleaning solution as a first step.
- Use a moist cloth to wipe the scanner glass carefully.
- You can keep your scanner running smoothly and reliably by cleaning the scanner glass.
- Follow these steps to clean the feed rollers properly:
- To clean the scanner’s feed rollers, it is recommended first to consult the scanner’s user handbook.
- Cleaning your scanner regularly to eliminate dust and other debris is crucial for running it well.
- The outside surfaces, scanning glass, and paper tray mechanisms of a scanner are all potential accumulation points for dust and debris.
- To clean the scanner’s more inaccessible crevices, a can of compressed air comes in helpful.
- A lint brush or adhesive tape can remove dust and other particles from the scanner’s surfaces.
- If you want to know how to clean your scanner, the best place to look is the manufacturer’s manual.
- If you want reliable scans, calibration of your scanner is a necessity.
- To begin the calibration procedure, please refer to the user handbook.
- Scan using the scanner’s software and control panel after placing the calibration sheet.
- Maintaining the life and efficiency of your scanner requires careful handling and storage.
- Keeping your scanner in pristine condition for as long as possible by following these handling and storage recommendations.
- Knowing how to troubleshoot your scanner might help you fix common errors and get it working again.
- If your scanner doesn’t power on, ensure the power cord is plugged in and not loose.
- If a piece of paper becomes caught in the scanner’s rollers, a paper jam will result.
- Here’s what you should do to fix the problem:Turn the scanner off and remove it from its power source.
- Remove any torn paper or other debris that may have been found inside the scanner.
- Make sure the scanner’s resolution is adjusted properly.
- Adjust the resolution so that it is suitable for the scanned document.
- In most cases, increasing the scan resolution will improve the scan quality.
- Here are some things to try if you’re having difficulties with the scanner’s software or getting it to work with your computer. Ensure you’re using the most recent drivers and software for your scanner.
- Verify that your operating system is suitable for the scanner’s software.